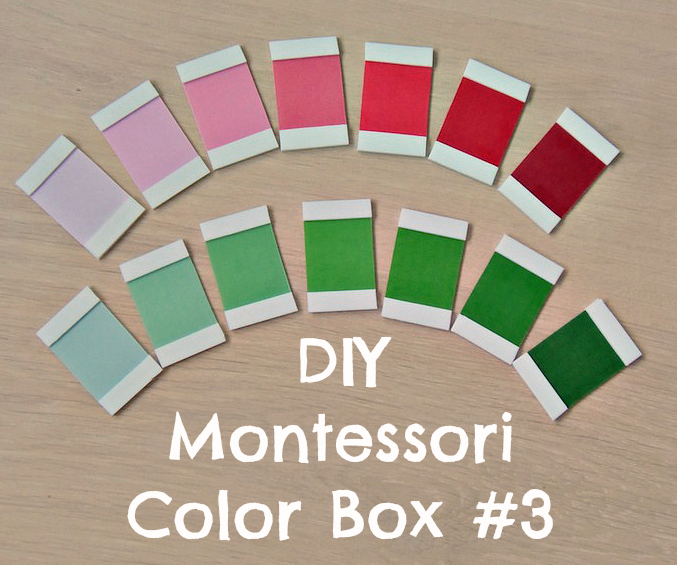
The color box # 3 is a Sensory material that can be made at home with very cheap materials, I am very happy how the tablets have turned out, although they don’t have that nice feel that the wood gives they serve their function perfectly and are quite resilient.
Will you give this DIY Montessori Color Box a try? Here we go!
Materials:
- Printable color tablets. I‘ve used the free printable from “Montessori Album”.
- White EVA foam (1 A3 sheet or 2 A4 sheets)
- Ruler
- Exacto knife
- Scissors
- Shears (if you don’t have you can use scissors)
- Glue
- Box with 9 compartments to keep the tablets
Steps:
1. We print the printable (pun intended) and we laminate. Once laminated we cut each row of tablets with the shears or scissors.

2. We cut with cutter and ruler EVA foam strips that will be the edge of the tablets. The strips must have a width of 1 cm and a length equal to that of the row of tablets. As we have 9 rows (9 colors) and we have to put 4 strips in each, we will need a total of 36 strips of EVA foam.

3. We stick the EVA foam strips on the white stripes of the colored rows (front and back).

4. Now we just have to cut with scissors the colored tablets …

5. And ready, we put them in their box and keep them ordered and prepared to work with them.

Latest posts by Cristina Tebar - Montessori en Casa (see all)
- 3 Extensions for the Geometric Solids - August 6, 2015
- 15 Tips For Traveling With Kids The Montessori Way - July 21, 2015
- Sunflower Life Cycle - June 4, 2015
What kind of glue did you use to get the foam to stick to the laminate? I used pva glue and it kept sliding off.
Hi Deedee,
I used “Glossy Accents”, it’s a glue commonly used for scrapbooking 🙂
Thank you for your reply! Did you have to let them dry for a long period of time before use?
I think I let them dry at least overnight.
muchas gracias, muy útil para mis alumnos
from Perú
Me alegro de que te haya resultado útil, Adriana! 🙂